This article demonstrates how to deal with IBM Watson Visual Recognition instances.
What you'll need:
Skill level: Easy
Time required: 3 minutes
- IBM Watson account
Creating an instance
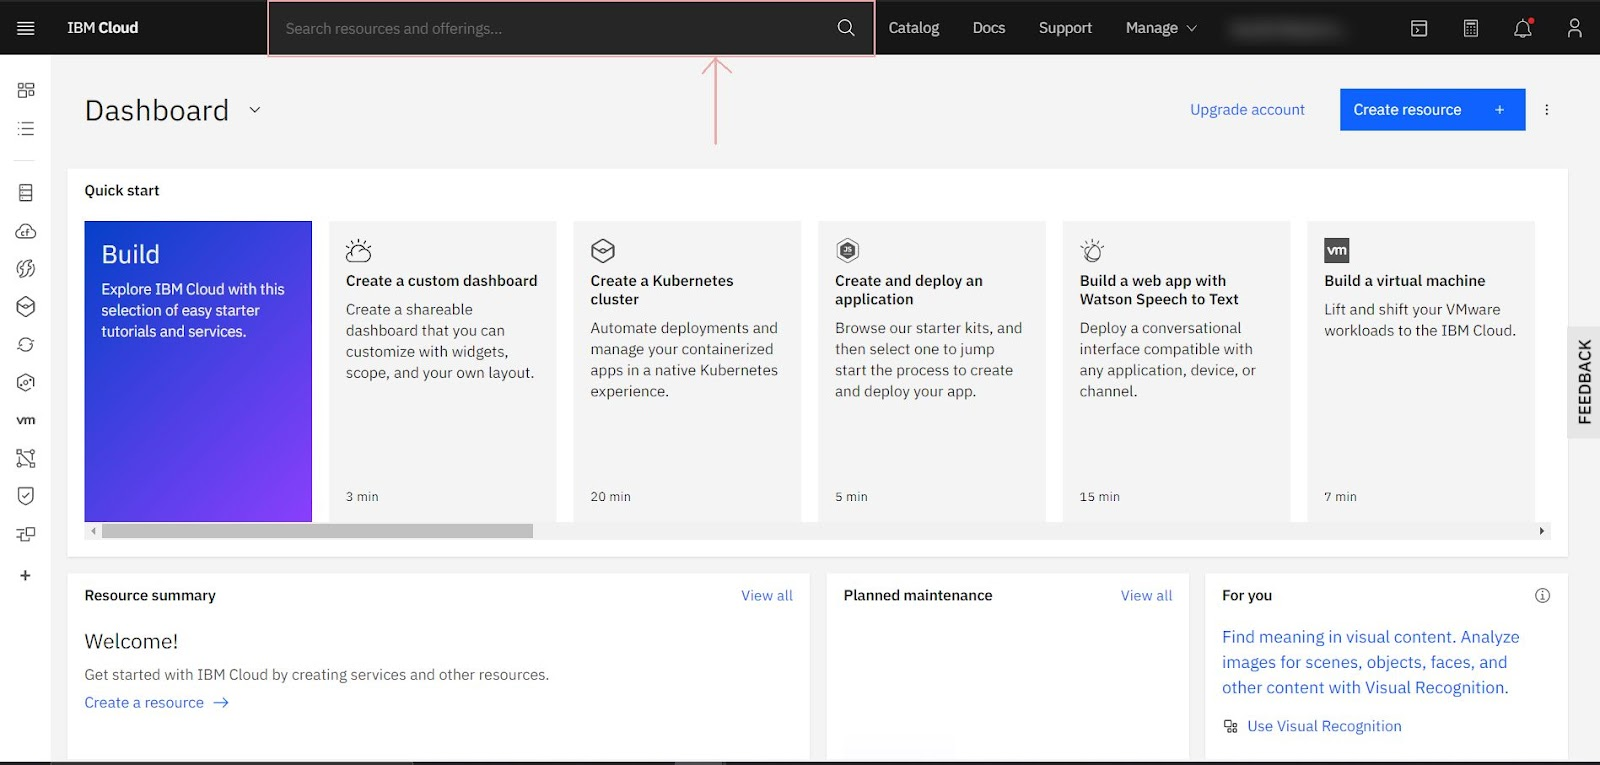
- Log in to your IBM Watson account and open your dashboard:
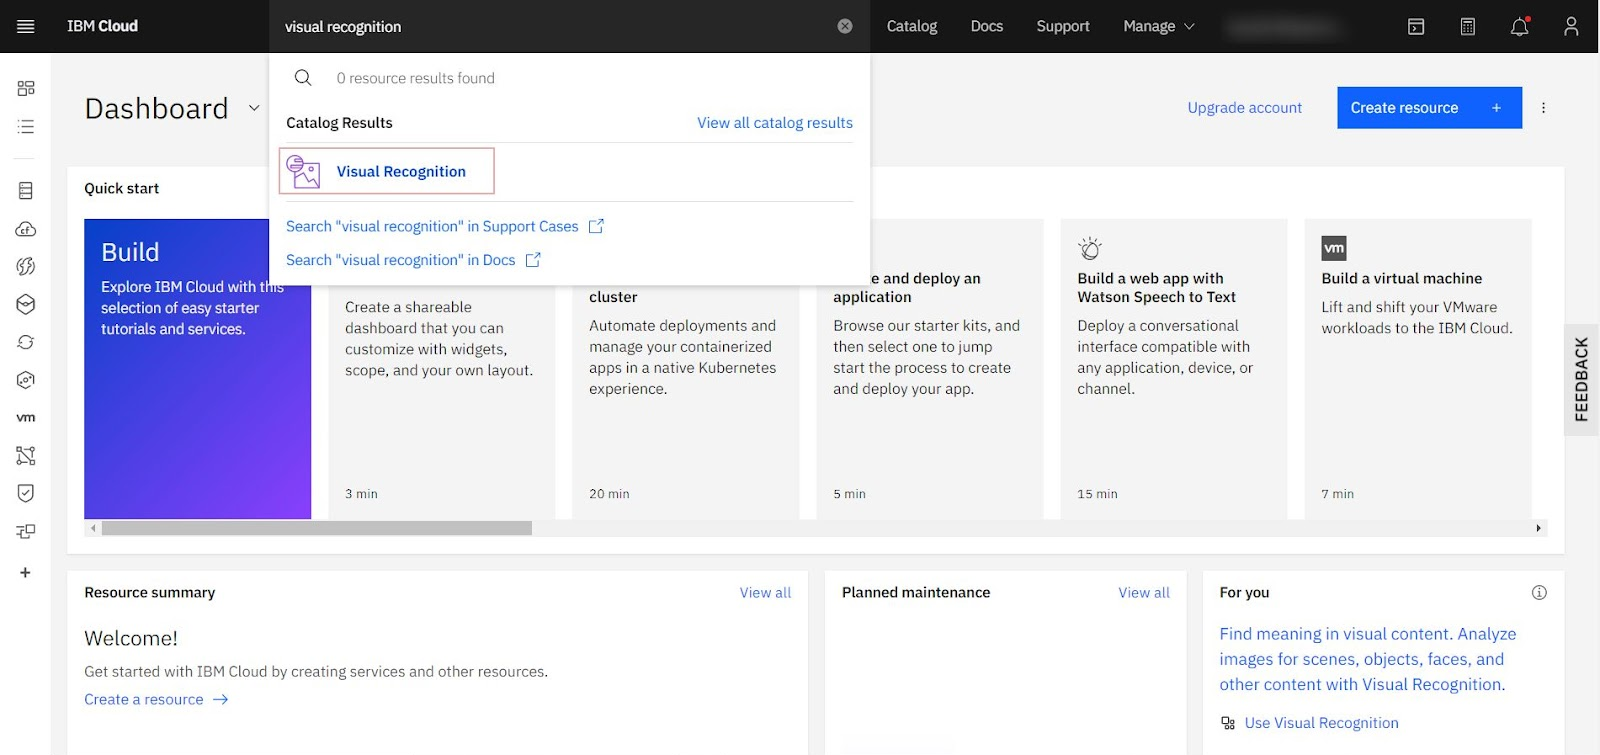
- Click on the search bar provided at the top and type Visual Recognition. You’ll see a suggestion for Visual Recognition appear as shown below. Click on it:
- You'll be taken to the service page. Select a location for the service from the drop-down menu. By default, Dallas was selected as a location for the service. Click the Create button:

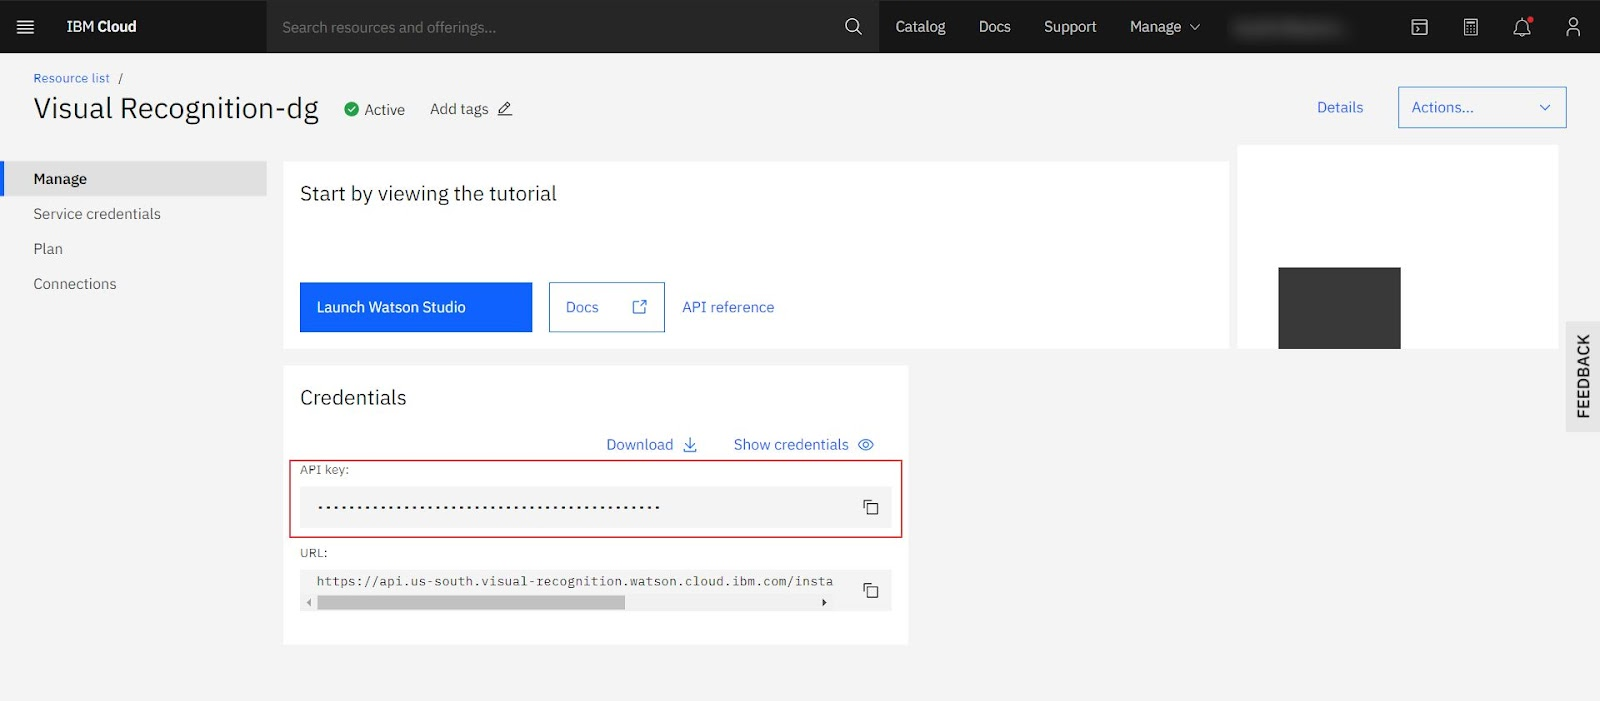
- Your Visual Recognition service is now successfully created and you'll be redirected to the Visual Recognition service page. You can directly copy the API key from here and start using the API:
Deleting an existing instance
The Visual Recognition service is a Lite plan service that IBM offers. According to this plan, only one of its instances can be created in the IBM Watson account. If you want to create a new Visual Recognition instance, make sure you don't have any other existing Visual Recognition instances else, you'll get the following screen while creating a new instance:
To deal with this, click the delete link. This will redirect you to the Resource list window. The Visual Recognition service is located under Services. Click on the three vertical ellipses present on the right side of the service bar and select the Delete option. Your existing Visual Recognition instance will get deleted: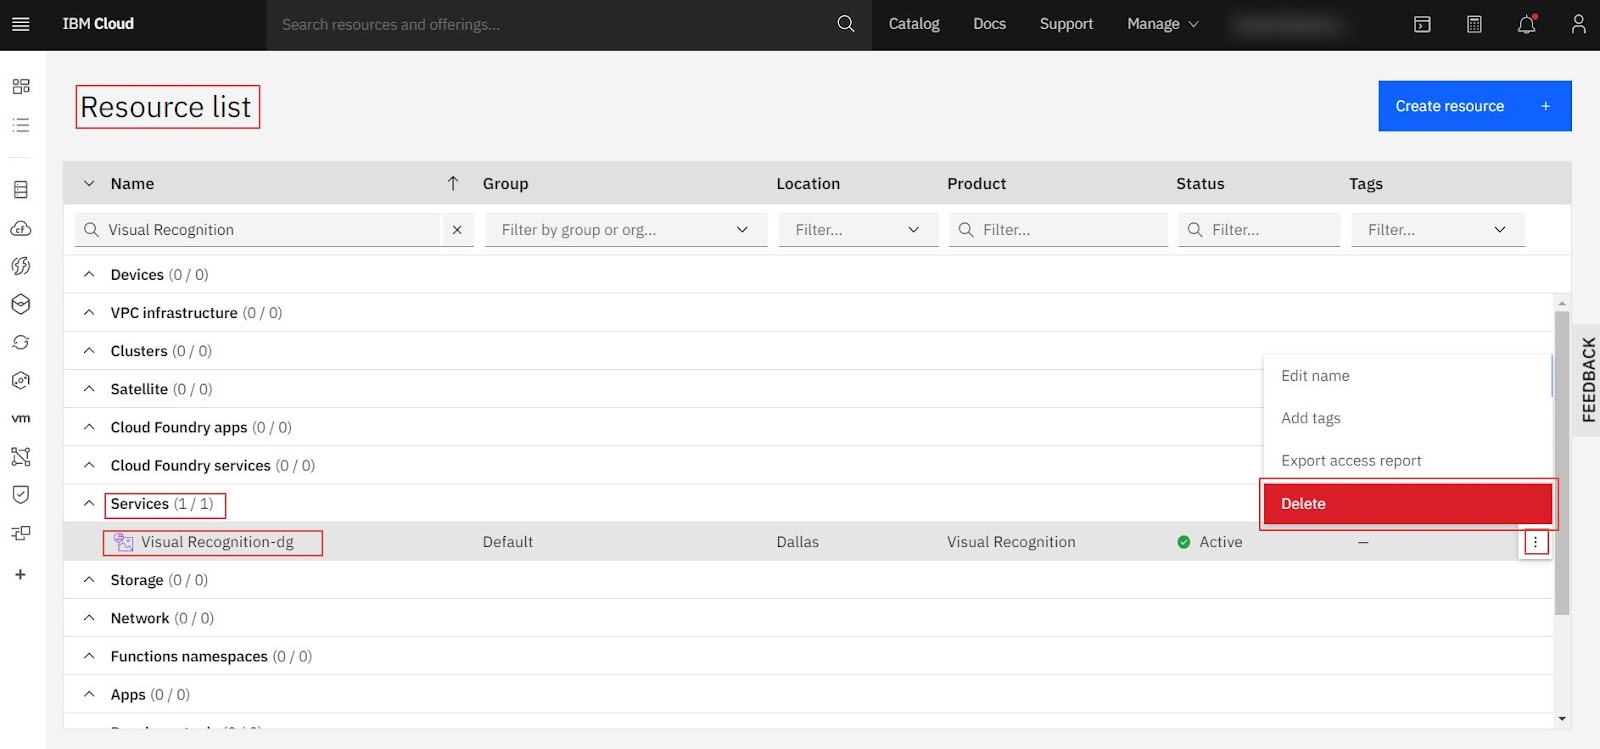
Now you can successfully create a new Visual Recognition service instance whenever required and connect it with Quickwork again.
Comments
0 comments
Please sign in to leave a comment.