This article demonstrates the conversion of HTML code into a PDF file using the Sejda app along with Scheduler by Quickwork.
What you'll need:
Skill level: Intermediate
Time required: 5 minutes
- Sejda account
- Skills to specify HTML code
- Scheduler by Quickwork as a trigger--for triggering the journey
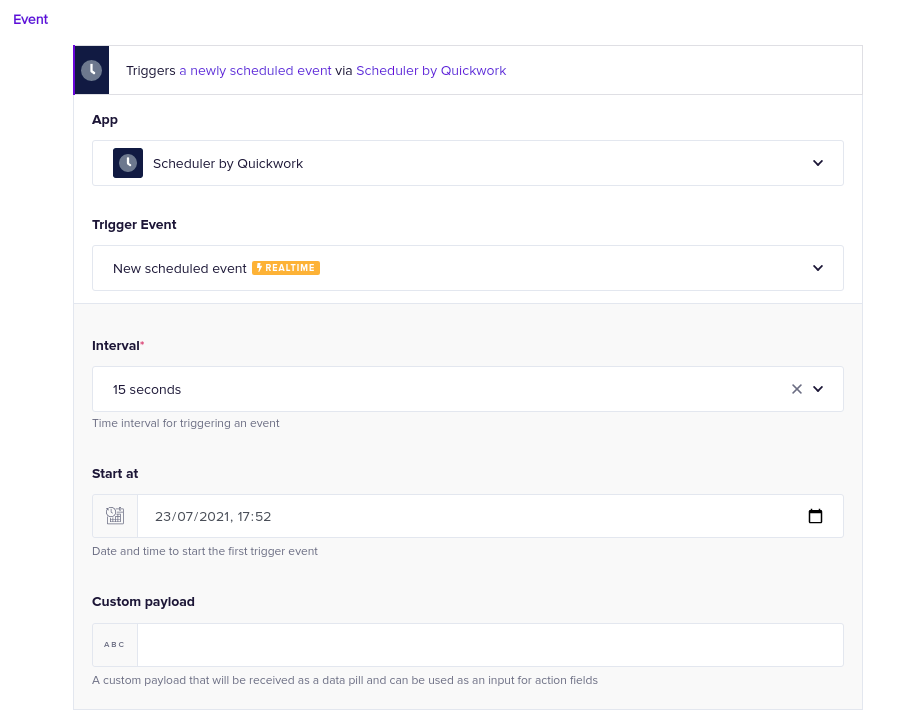
Configuring the trigger
- In the Event section, choose the Scheduler by Quickwork app from the drop-down menu in the Apps field present right below the New Trigger button.
- Select the trigger event as New scheduled event from the drop-down menu in the Triggers field.
- Set the Interval as per your choice based on how often you want the PDF file to be generated.
- Set the Date and Time of your choice in the Start at field and keep the Custom payload field empty.
- No authorization is required as this is an app created by Quickwork:
Configuring the action steps
- In the Steps section, click on the Simple Action and choose the Sejda app from the drop-down menu in the Apps field.
- Select the Action as Convert HTML to PDF from the drop-down menu.
- Click on the Link an account button to establish a connection.
- The Connect to Sejda window will pop up asking you to enter the API Key of your Sejda account. Click here to know how to get the API key:
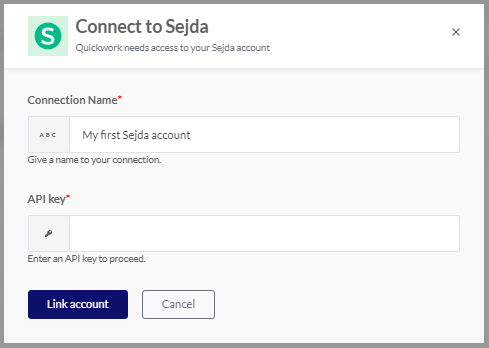
- Once all the required inputs have been specified, click on Link account. Your Sejda account will get connected successfully.
- In the HTML field, enter your HTML code of which PDF file you want to create. This field is mandatory. Following is the sample code we have used:
<h1>Heading 1</h1>
<h2>Heading 2</h2>

        <h3>Heading 3</h3>

        <p>This is a paragraph.</p>

        <p>This is another paragraph.</p>

        <ul>

        <li>Coffee</li>

        <li>Tea</li>

        <li>Milk</li>

        </ul>

        <ol>

        <li>Coffee</li>

        <li>Tea</li>

        <li>Milk</li>

          </ol>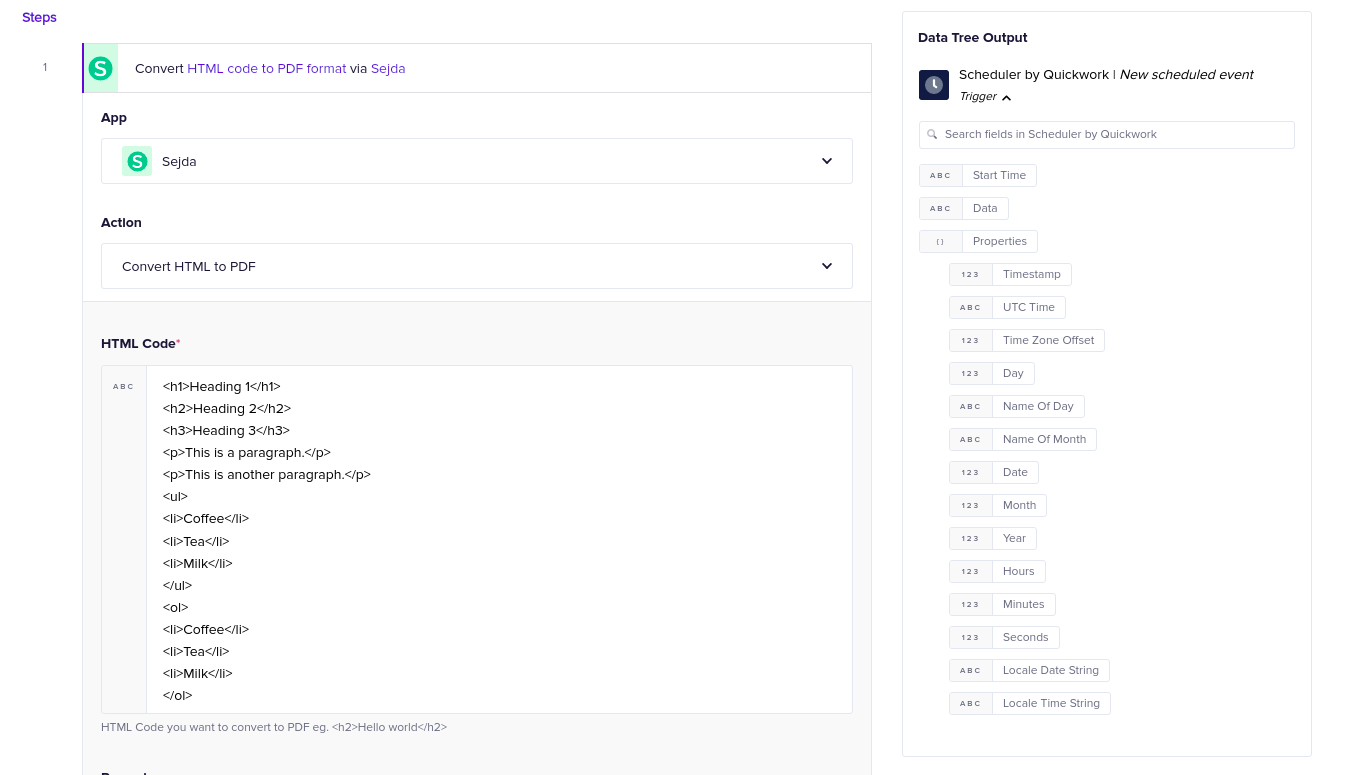
- After entering the HTML code, there are some additional optional fields such as Page Size, Page Orientation, Viewport Width, Use Print Media, Delay, Page Margin, Page Margin Units, and Name. These fields are optional. You can enter the relevant details as per your requirements of the PDF file you wish to generate.
Executing the journey
Save the changes in the journey and click the Save & Start button. You'll be taken to the History tab automatically. Click on the journey ID that just got executed. In the Steps section, click the action bar to expand. The Input block shows the inputs provided. In the Output block, you'll get a URL for the created PDF file:
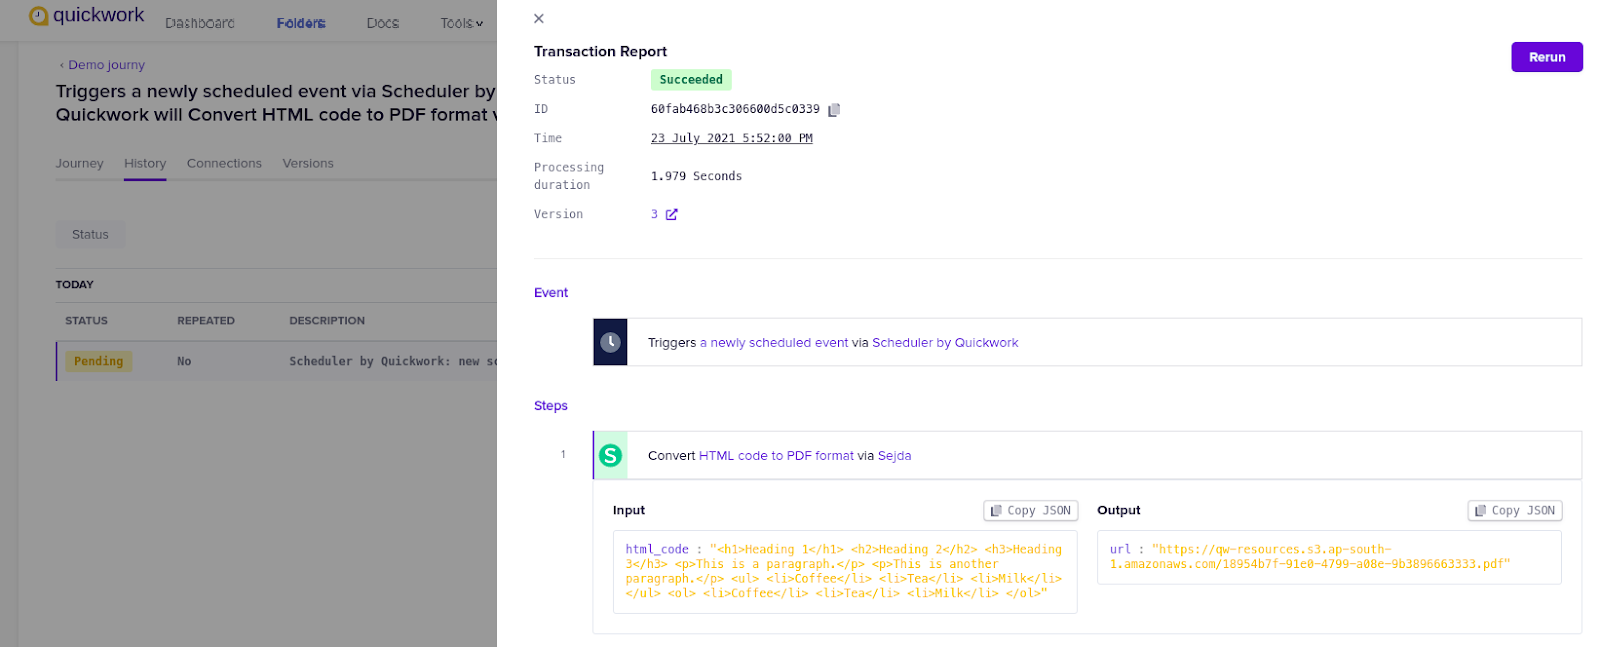
Copy the URL and paste it into a web browser to view the created PDF file:
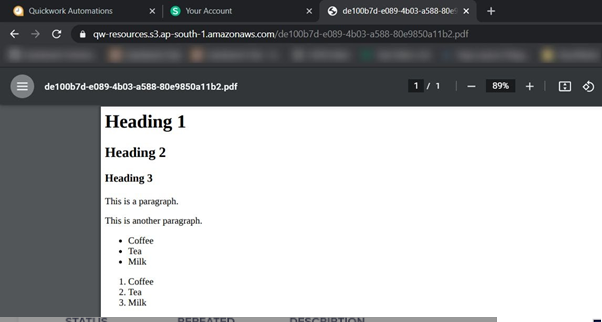
Thus, your HTML code has been successfully converted to a PDF file.
Comments
0 comments
Please sign in to leave a comment.