This article demonstrates how to capture the information of a lead through Facebook Ad Leads and store it in Google Sheets.
What you'll need:
Skill level: Intermediate
Time required: 7 minutes
- Facebook account
- Facebook page
- At least one ad created and published on the Facebook page
- A spreadsheet in Google Sheets
Prerequisites
Create a Facebook Ad Leads form in a specific Facebook page and publish it on all the possible social media platforms such as Instagram, Pinterest, blog pages, etc. from where you can capture the data of leads. For example, refer to the following Facebook Ad Leads form that will be used to explain the journey execution:
The name of the Facebook page is Automation Quickwork Prod Testing and the name of the Ad Lead form is Lead Generation Campaign. Click here to know how to create a Facebook Ad Lead form page.
The above Ad Lead form contains five fields i.e. Full name, Email address, Phone number, Country, and ZIP code.
Now, create a spreadsheet in Google Sheets with a name as Facebook Lead ads data. In the spreadsheet, name the columns as per the name of the Ad Lead form. Refer to the following image:
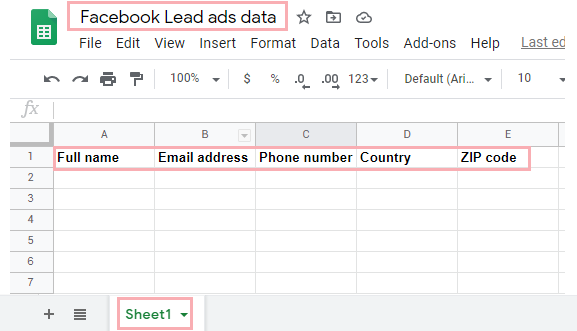
Keeping the column names in the Google Sheets as same as the Ad Leads form fields helps in easy data mapping.
Configuring the trigger
To set up the Facebook Ad Leads trigger for capturing the data, follow these steps:
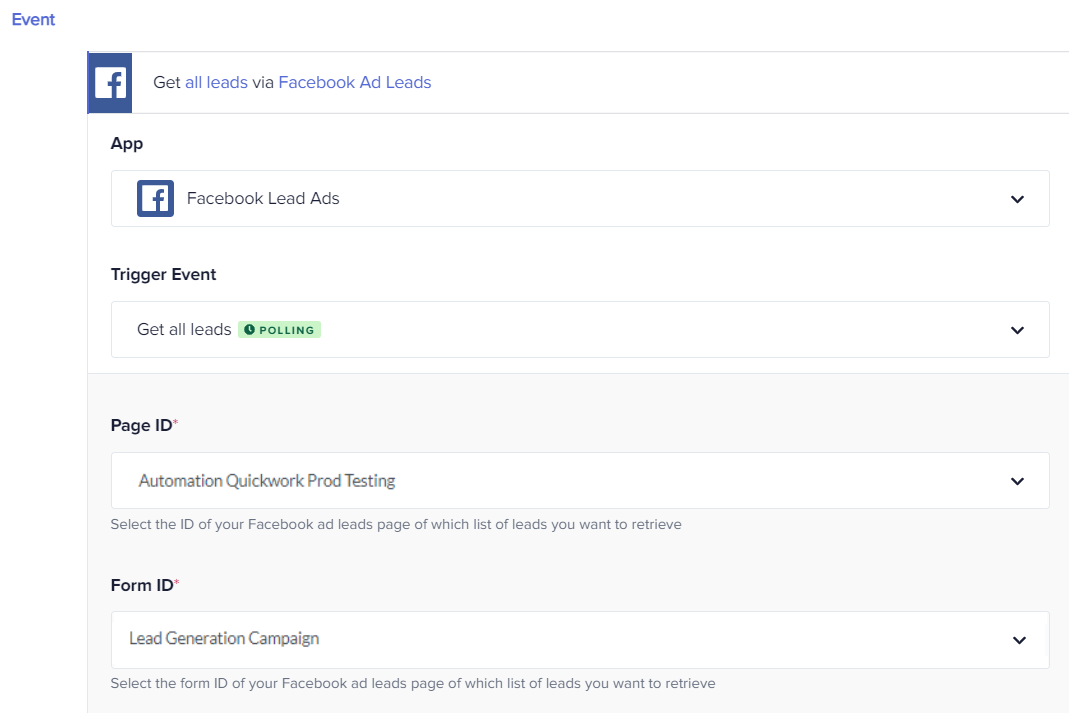
- Under the Event section, choose the Facebook Ad Leads app from the drop-down menu in the App field.
- Select the trigger event, Get all leads, from the drop-down menu in the Trigger Event field.
- For authorizing your Facebook account, select an existing connection from the drop-down or create a new connection.
Note: While establishing a connection with your Facebook account, ensure you select a Facebook page that has an Ad form page published in it. In our case, I have selected the Automation Quickwork Prod Testing Facebook page that has the Lead Generation Campaign form. Click here to know how to create this new connection. - After a successful connection establishment, the input fields will open. In the Page ID field, select the Facebook page that has the ad form in it. It is the Automation Quickwork Prod Testing page in our case.
Note: Ensure you select the same Facebook page here that you have selected while establishing the connection. - In the Form ID field, select the Ad lead form using which you want to capture the data of leads:
Configuring the action
To set up the Google Sheets-Add row action to store the data, follow these steps:
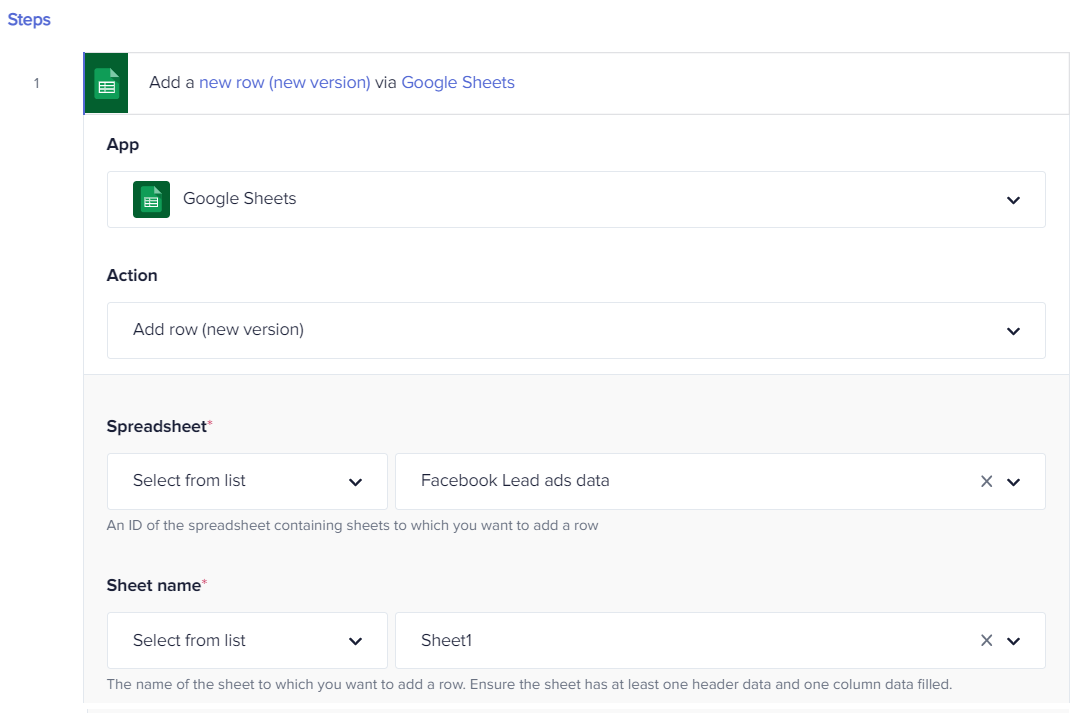
- Under the Step section, choose the Google Sheets app from the drop-down menu in the App field.
- Select the action, Add row (new version), from the drop-down menu in the Action field.
- For authorizing your Google Sheets account, select an existing connection from the drop-down or create a new connection. To create a new connection, simply click the Link account button, choose the Google account which contains the Facebook Lead ads data spreadsheet and click the Link account button. Your connection will get established.
Note: Ensure you connect the Google account that has the Facebook Lead ads data spreadsheet created. If you connect a Google account that hasn't the corresponding spreadsheet, the column names that we defined previously won't get populated in Quickwork. - Upon successful connection, the input fields will open. Select Facebook Lead ads data as an input from the Spreadsheet drop-down menu.
- Select Sheet1 as an input from the Sheet name drop-down field:
- As soon as you select the sheet name, the column names will get populated.
- In the Full name field, pass the
Textdata pill under theFull namedata pill from the Get all leads Trigger output. Refer to the following image: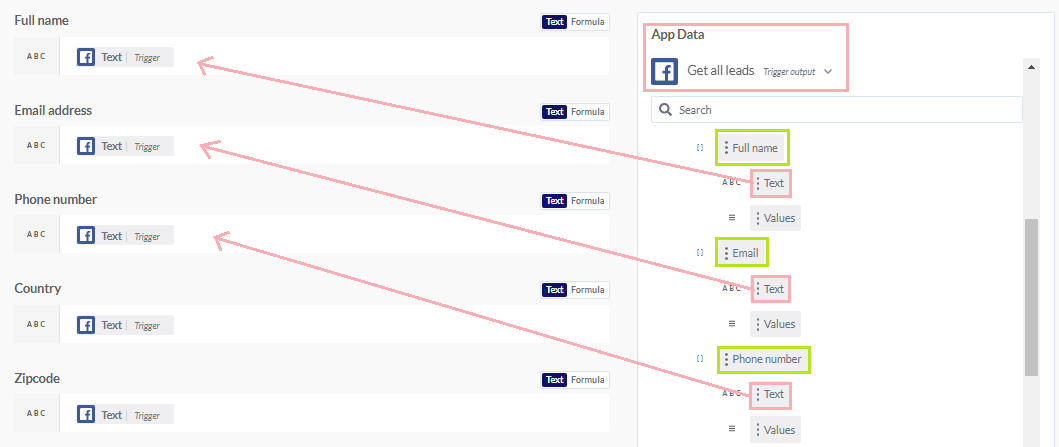
- In the Email address field, pass the
Textdata pill under theEmailobject from the Get all leads Trigger output. - In the Phone number field, pass the
Textdata pill under thePhone numberobject from the Get all leads Trigger output. - In the Country field, pass the
Textdata pill under theCountryobject from the Get all leads Trigger output. - In the ZIP code field, pass the
Textdata pill under theZip codeobject from the Get all leads Trigger output: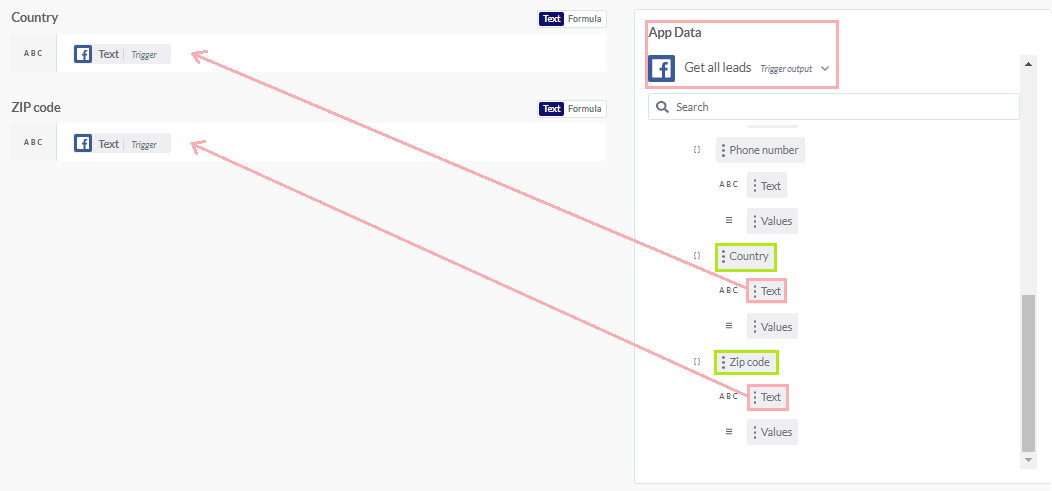
- The configuration of the journey is completed and it looks like this:

Executing the journey
Click the Save Changes button to save all the changes and then click the Save & Start button. If there are no errors, you'll be taken to the History tab.
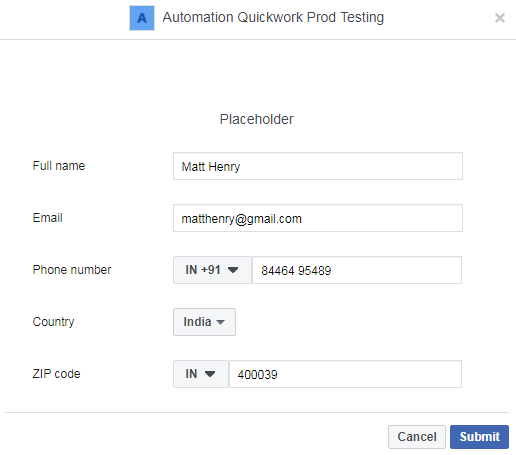
Now, go to the Lead Generation Campaign form that we created and configured in the journey. Fill the form details and click the Submit button:
After 10 seconds, the data entered in the Lead Generation Campaign form will get stored in the respective columns of the Facebook Lead ads data spreadsheet:

Note: Get all leads is a polling trigger. Polling triggers check for updates every 10 seconds.
Thus, all your lead information from various sources can now be stored in one place using this journey.
Comments
0 comments
Please sign in to leave a comment.