This article demonstrates how to establish a connection of Amazon Rekognition with Quickwork.
What you'll need:
Skill level: Intermediate
Time required: 6 minutes
- AWS console account
- At least one user in the IAM console
- An S3 bucket
- Amazon Rekognition and Amazon S3 policy configured
To connect your Amazon Rekognition account with Quickwork, follow these steps:
- Go to Quickwork and choose the Amazon Rekognition app from the App drop-down field under the Steps section.
- Choose an action of your choice.
- Click on the Link an account button to establish a connection.
- The Connect to Amazon Rekognition window will pop up asking you to enter the Access key ID, Secret access key, and Region of your Amazon Rekognition account:

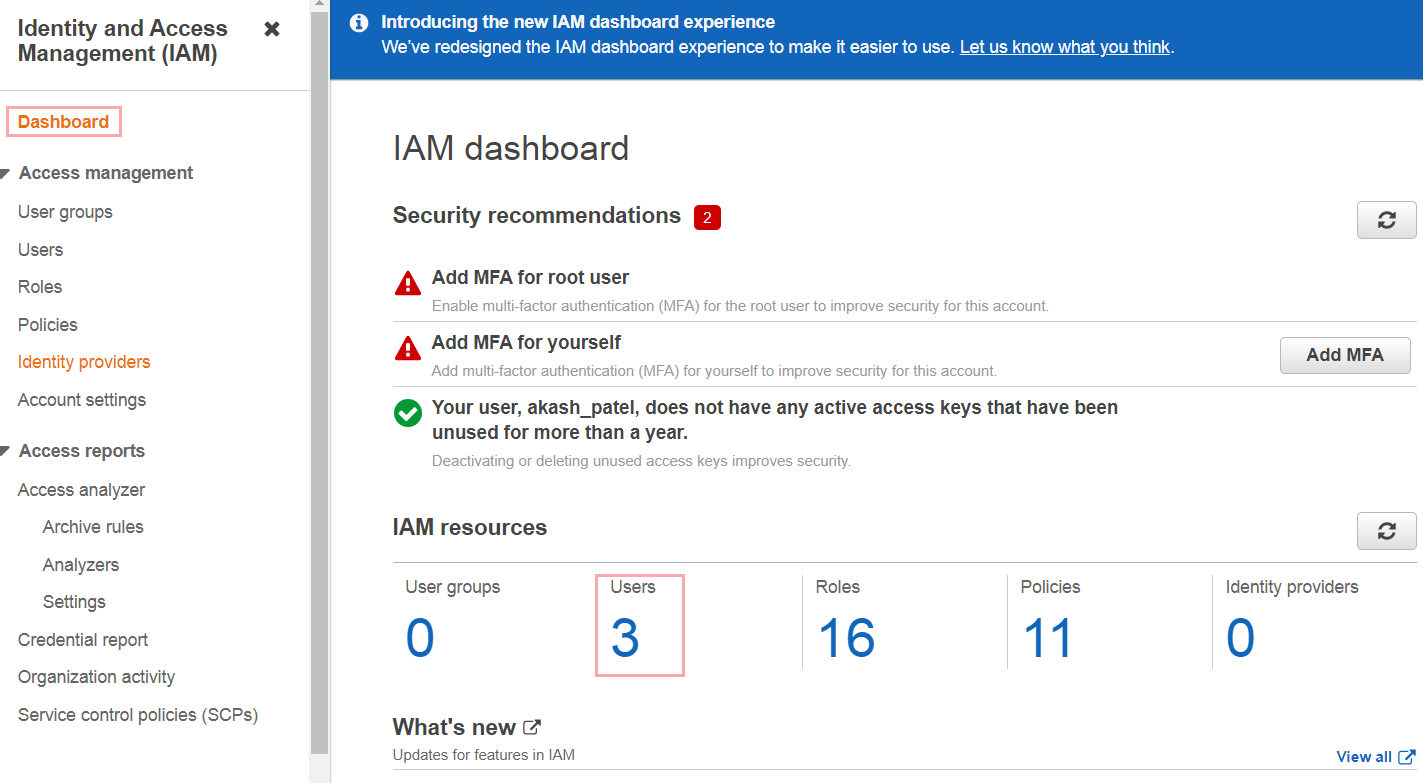
- To get these credentials, log in to your AWS console account. You'll be on the AWS Management Console dashboard. Click the Services tab on the toolbar and select IAM from the Security, Identity, & Compliance section:

- You'll be redirected to the Identity and Access Management window. Under the IAM Resources table, click the Users link:
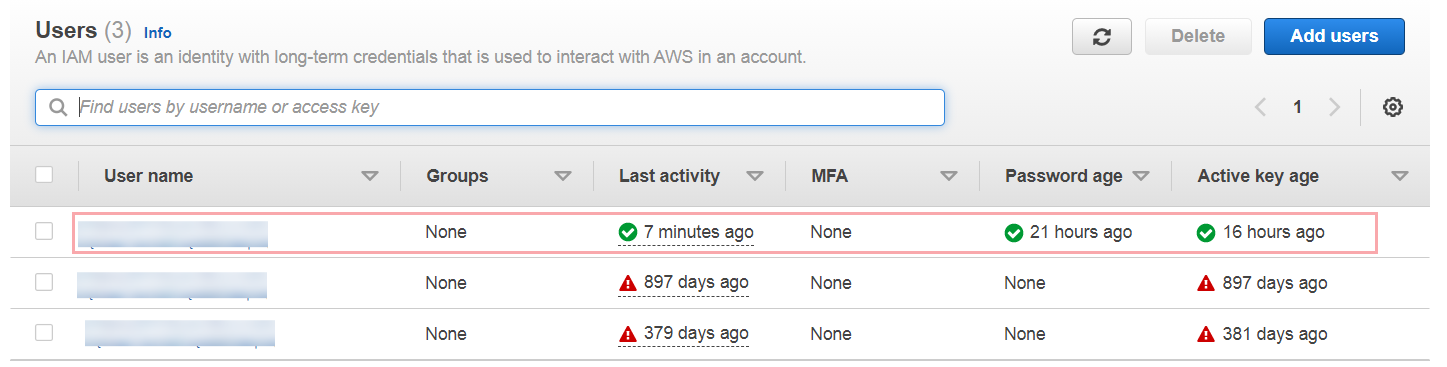
- You'll get a list of users. If you are yet to create a user, please do so by clicking the Add user key. Click on any of the user names to proceed further:
-
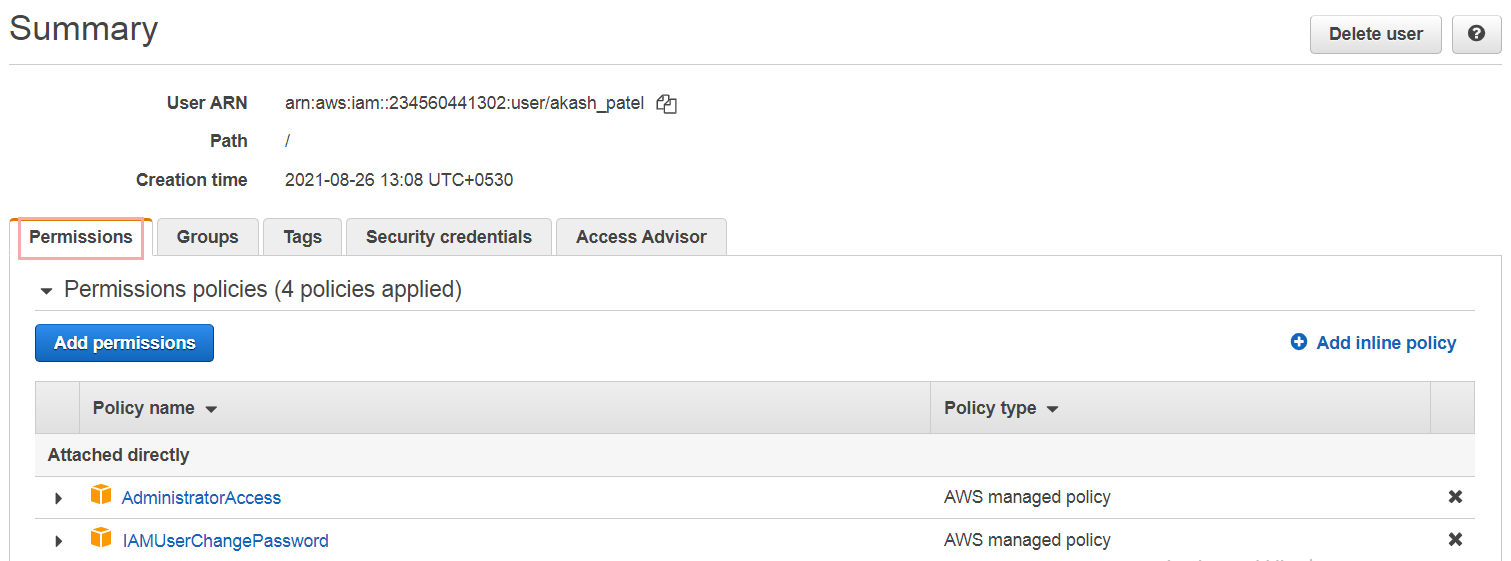
Scroll down to the Permissions tab. Here, we need to add policies for the user. Click the Add inline policy button:
-
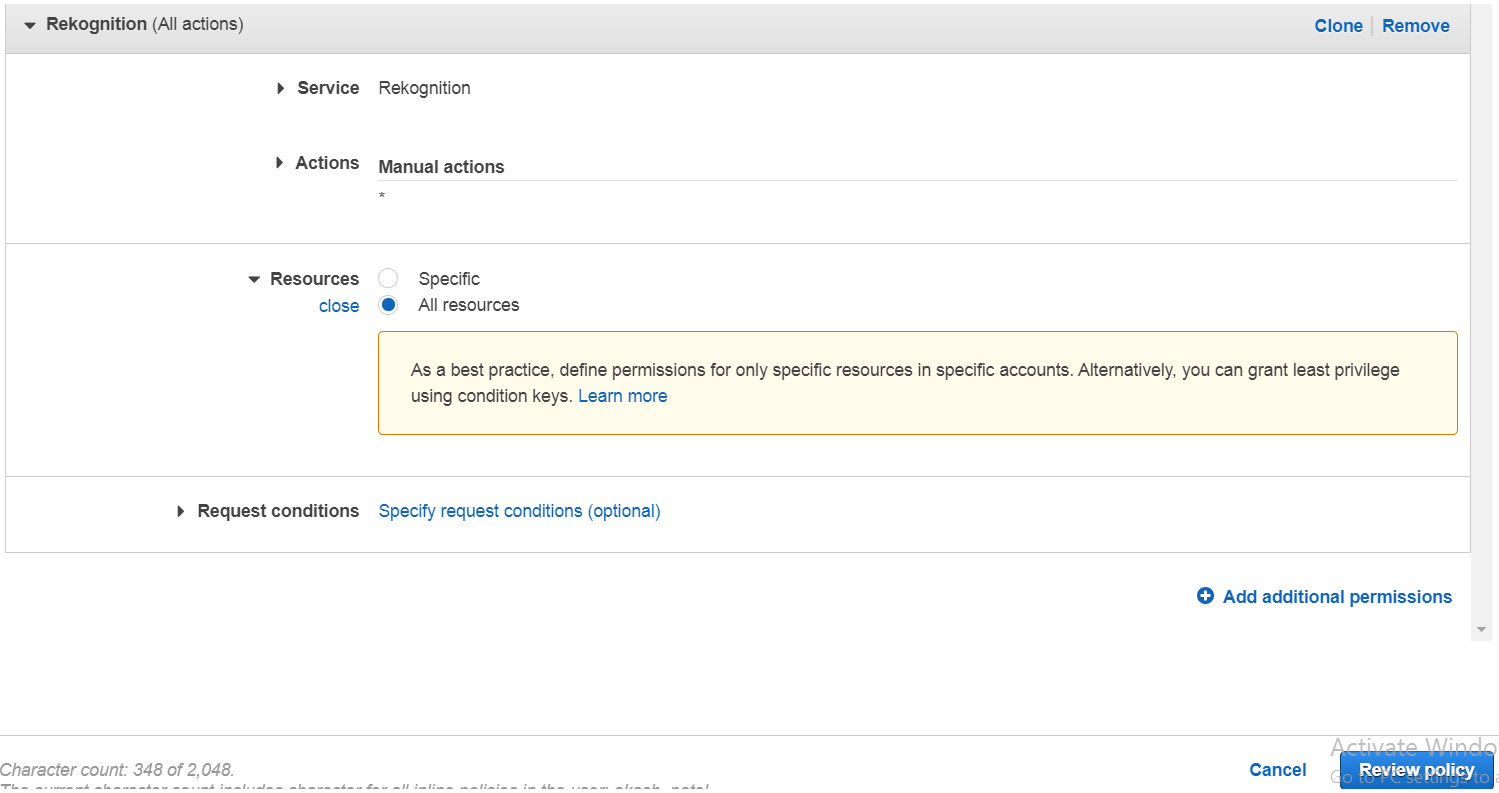
In the Service input field, enter Rekognition and select it. Then manually select All Rekognition actions with the Read, List, Tagging, and Write permission. Next, select All resources with the above-granted permissions:
-
Then click the Review Policy button. Next, give a name to the policy without using space. E.g., AmazonRekognition:
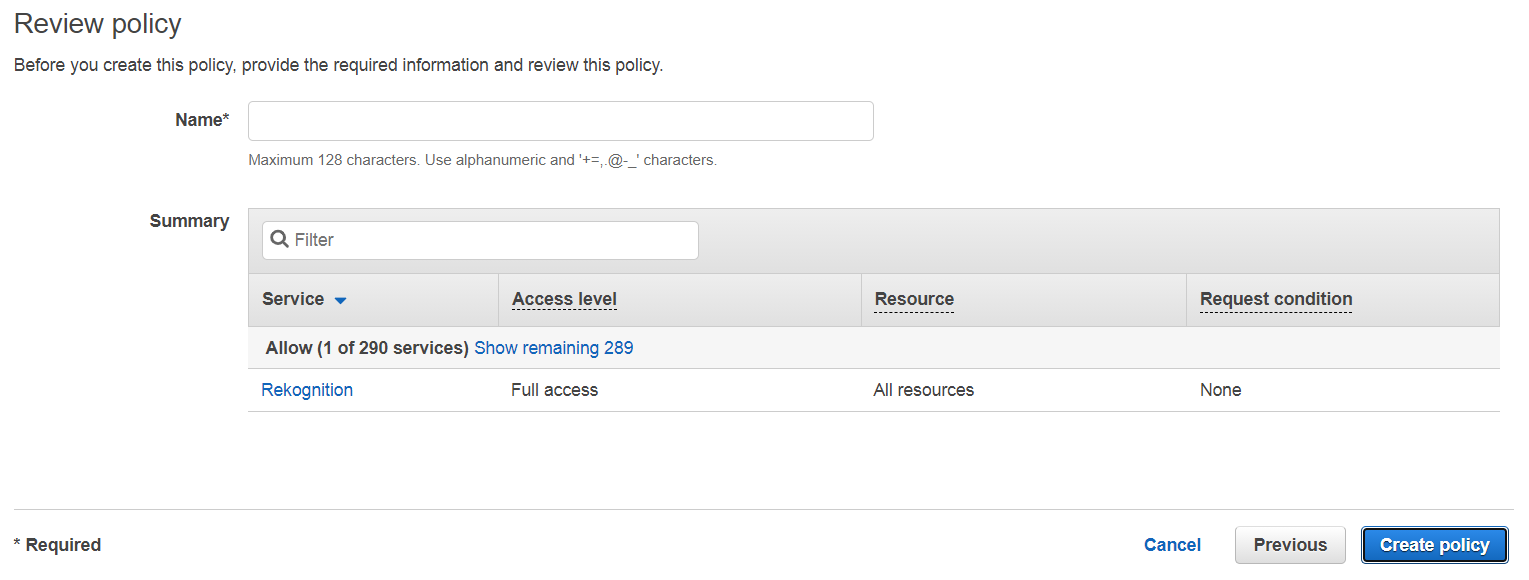
-
Then click the Create policy button. You’ll be redirected back to the Permissions tab with the policy added to the list:
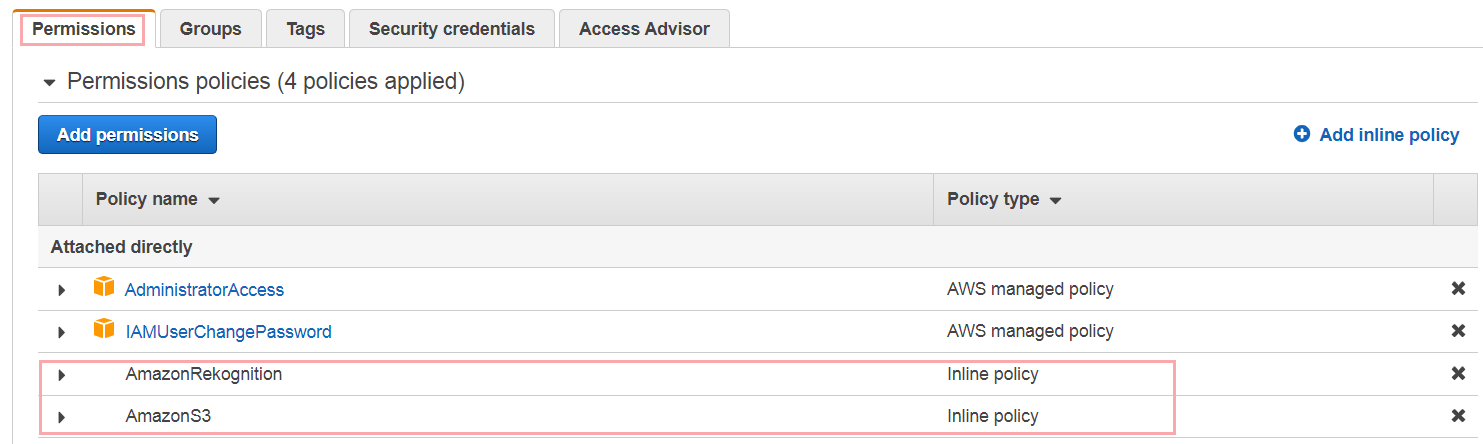
-
Similarly, add the S3 policy to the list.
- Now switch to the Security credentials tab and scroll down the page to search for the Access keys section. Here, you'll get a list of Access key ID if generated previously. However, the secret access key is hidden for security reasons. To get it, click the Create access key button:
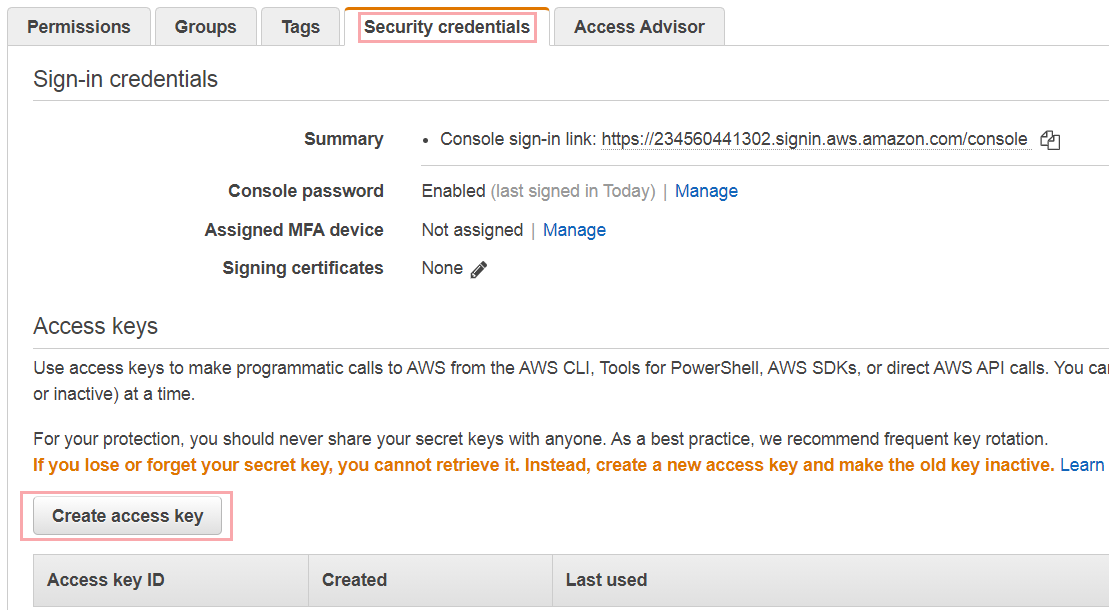
Note: If you are unable to click the button, delete any one of the existing access key IDs by clicking the cross mark icon. - The secret access key gets generated. Please make a note of it as you cannot recover them later. Click the Show button to view the secret access key :
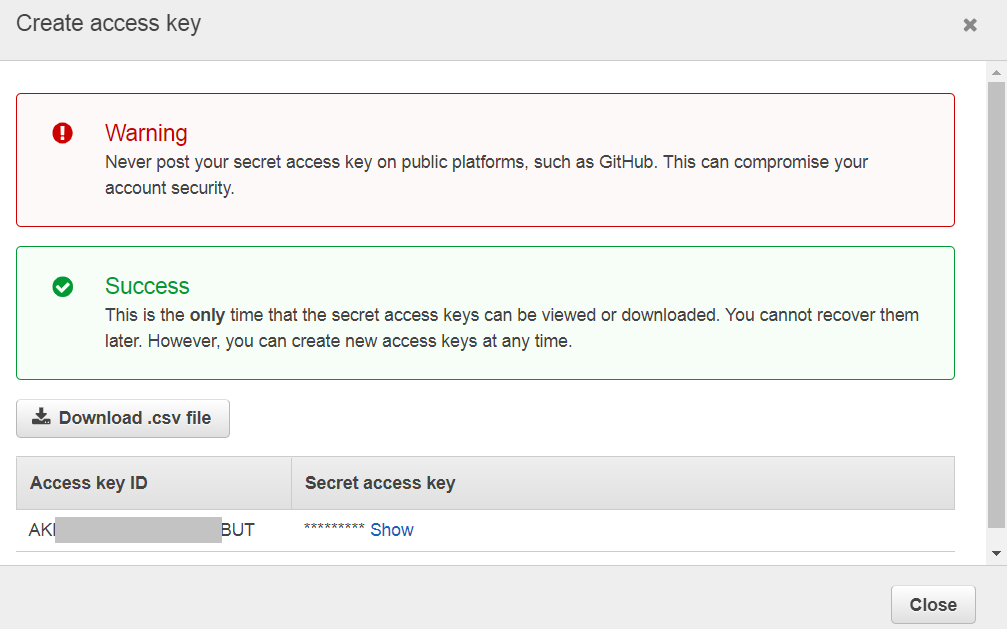
- Copy this Access key ID and Secret access key and paste them in the relevant fields of the Connect to Amazon Rekognition window.
- You can use the Amazon S3 region. For that, you must have an S3 bucket created in your AWS console account. You’ll get the region beside the bucket name:
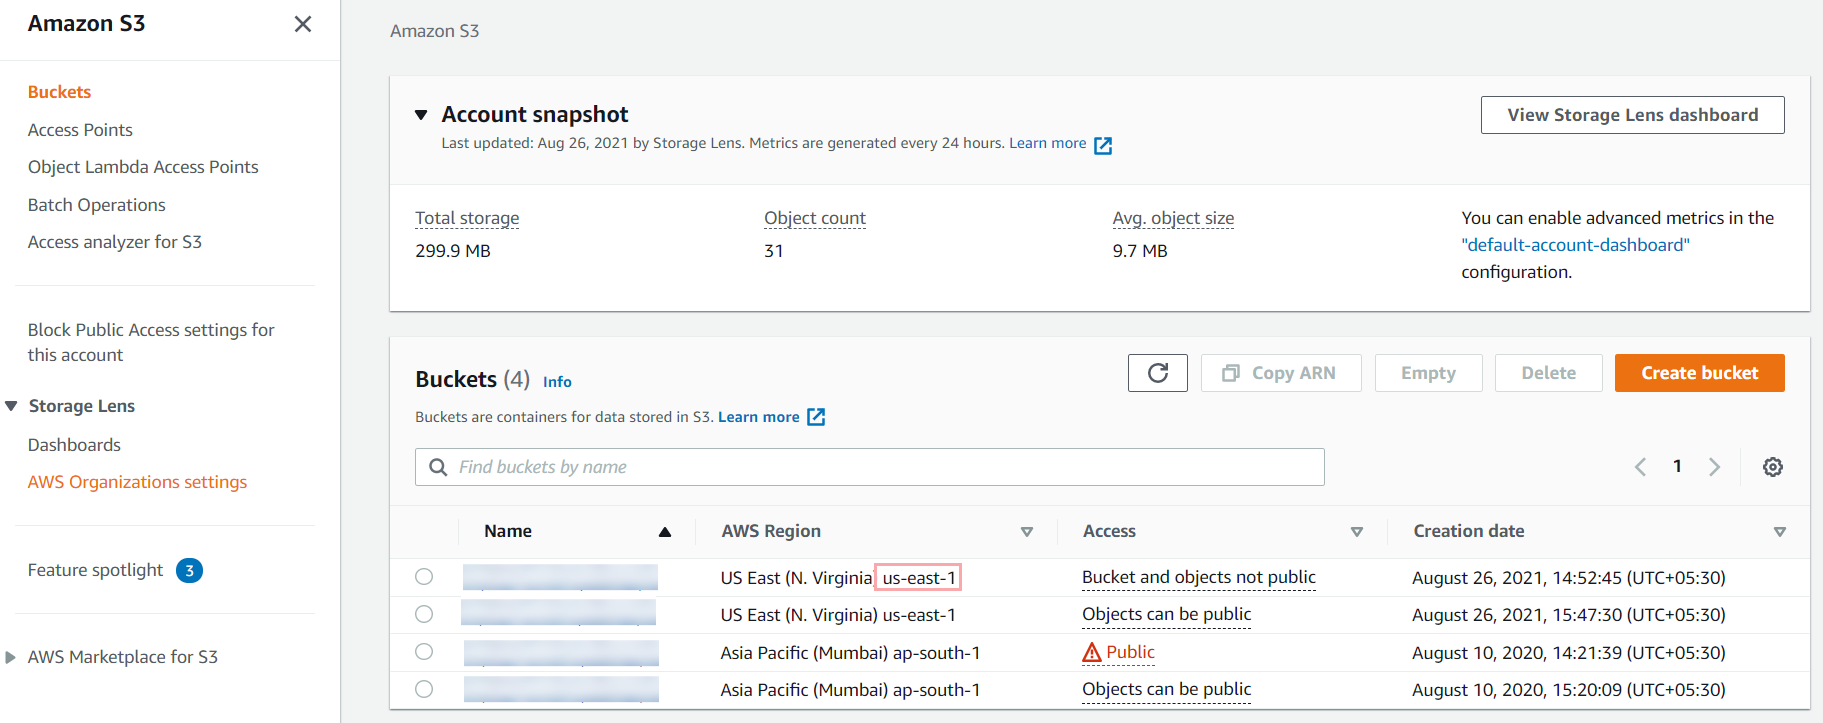
- Specify the same in the Region field:

- Once done specifying all the inputs, click the Link account button. Your Amazon Rekognition service will get connected successfully.
Comments
0 comments
Please sign in to leave a comment.